Recording Drums
Modern recording technology has paved the way for affordable home recording. We are now seeing a massive shift from the traditional studio approach to a more do it yourself industry. Most instruments are easy to record with only one or a few microphones. While many people assume that by recording drums you will need many, this is not necessarily the case. A full mic’d kit will give you a much better representation, and a lot more versatility in your mix. However, it isn’t strictly necessary and you can get away with using as little as two microphones. You will still be able to produce a reasonable recording.
In this article, I am going to suggest a way in which you can record drums with two mics, three mics, and a full mic’d kit. I’ll also explain some of the common pitfalls, and ways to overcome them.
As I previously explained in the guitar article, make sure to gain stage before you start recording.
The Room
The first thing you’ve got to consider when recording a drum kit is what room you are in. For best results try to find as dead a room as possible. This will give the recording as much versatility as possible for processing.
Two Mics
One of the common restrictions that a lot of home recorders face is how many mics they have available. But additionally, the number of inputs they have available on their interface. Commonly, most basic interfaces that home recorders use have only two XLR inputs available. Not to worry, though. As you don’t have to let this stop you recording drums. Adapt to a minimalist approach of just one dynamic microphone for the front of the kick drum. And also one condenser mic to capture the drummer’s perspective. You can still capture a good representation of a drum kit. The drummers perspective will capture an accurate representation of what the player will hear. And the kick mic will help maintain that punch necessary to capture an energetic performance.
When micing a kick drum, you have to take into account the sound pressure level (SPL) that a kick drum produces. And you have to choose your microphone accordingly. Condenser mics are generally not as good at handling high SPL without clipping as a dynamic microphone. This is due to the fact that a condenser mic has an internal pre-amp with a clipping point. Whereas a dynamic microphone doesn’t, and the clipping point is therefore determined by the pre-amps in your interface. Finding the best interface for recording drums for you will enable you to produce some epic tracks.
Further Tips On Mic Placement
Mic placement on a kick drum depends on whether you’re drumhead has a hole or not. If it does you should place the diaphragm of your mic just inside the hole. As all the sound will be focused out through the hole, and if you put the mic just outside it, you could get a lot of mud. If there is no hole, simply place the mic just in front of the skin.
As the whole kit is not mic’d evenly, it is a good idea to adjust your playing style accordingly. Try going lighter on the symbols and kick slightly and slightly harder on the snare and toms. Experiment around and then adjust your style accordingly.
Three Mics
If you do have more than two inputs available (yet don’t want to/can’t fully mic), it’s better to use two overheads in place of the drummers’ perspective mic. This will allow you to capture a good stereo image of the drum kit.
I would recommend using two condenser mics with a cardioid polar pattern (so to minimise reflections off the ceiling). One above the floor tom, and one above the Hi-hat, at equal height (between 30” to 60” above the snare). They should be facing each other at an angle of about 45 degrees.
Fully Mic’d
If budget is less of a restraint, by far the best way to get the most out of your drums is to fully mic the kit. Then you have the option to pick and choose which mics you will use in the mix after.
As always it’s best to experiment with mic choices and positions till you get the sound you’re looking for, but in the table below I’ve provided a good template to use as a starting point.
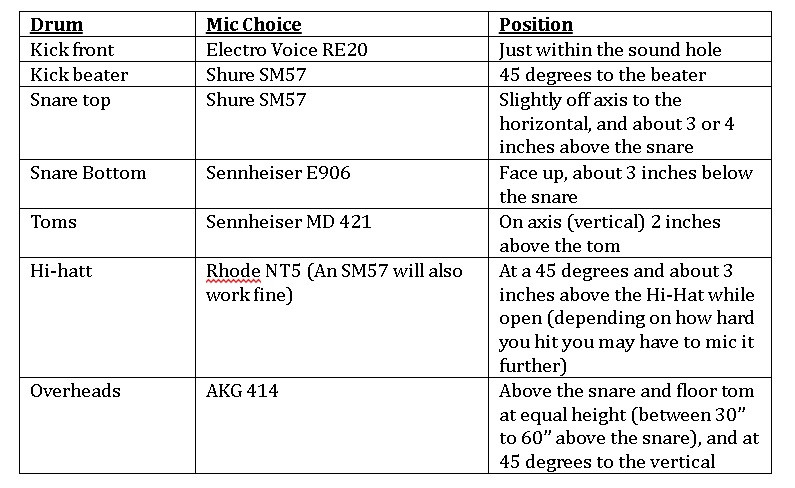
Again, this is just how I would do it so make sure to experiment.
Phase Cancellation
Due to the fact that there are multiple mics involved in recording drums, you are likely to encounter issues with phase cancellation. Phase cancellation is when the wave from one signal partly or fully cancels out that of another. If the two signals are at 180 degrees to each other they would cancel each other out completely and you would hear nothing, despite the fact that the sound is still playing.

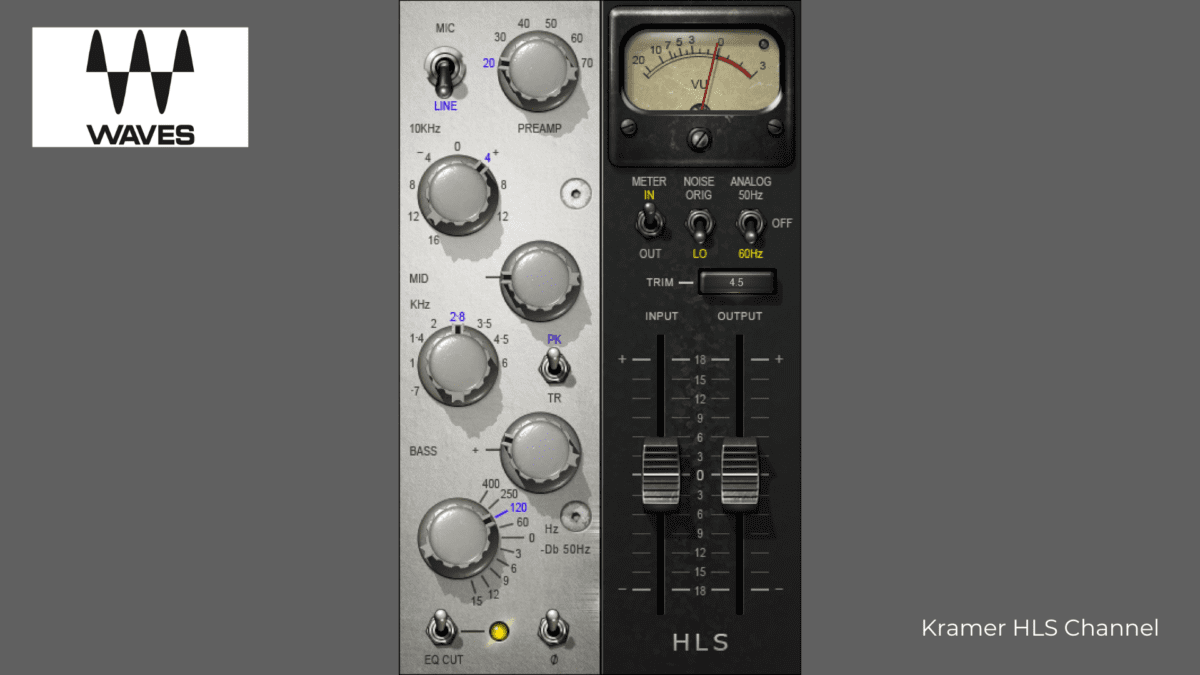
The main culprits for this are mics that serve a similar function, including top and bottom snare mics, in front of the kick and beater mics, and overheads, although you can also have more general phase issues as well. In the former case, the problem is easier to improve, due to the fact that you can simply flip the polarity of one of the mics, either by using the button on your interface if you’re lucky to have one or by using the phase reversal button (ø) on a channel eq.
More general issue, however, are a bit harder to solve, though they can be minimised using the 3 to 1 rule. When using multiple microphones, try to keep them at least three times further apart than they are to their respective sources. This significantly reduces the level of the signal from one source being picked up by another mic, and therefore reduces phase cancellation.
Like everything in music, rules are made to be broken, so make sure to play around with these rules and adapt them to tailor the sound you are recording to what you are looking for.
The Мusic Gateway Guide aims to cover all topics, and help artist development if there is any topic you wish to be discussed you can get in touch here.
Summary – Recording Drums
We hope you have enjoyed this article about recording drums. As you can see, recording drums is essential for musicians because it sets the foundation for the rest of the music. The drums provide the rhythm and groove that other instruments and vocals can build upon. If the drums are not recorded correctly, it can drastically affect the overall sound of the song. Additionally, if the drums are not recorded properly, it can be difficult to mix and master the track, resulting in a poor-sounding final product.


