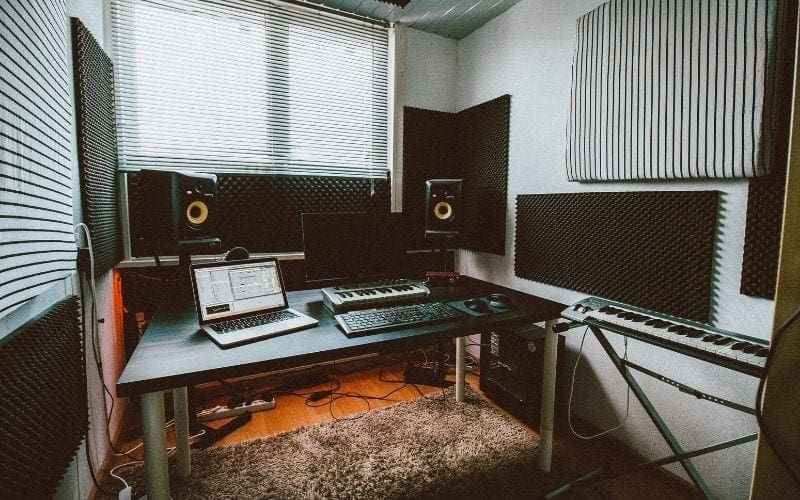
Are you building a rehearsal or recording studio or even just doing some recording or rehearsals at home? Soundproofing is a very important step to think about! Keep reading to learn all about how to soundproof a room!
How To Soundproof A Room
Soundproofing your home recording studio or music room is straightforward.
You don’t have to be a physicist or acoustician to install soundproofing material.
All you need to know is how sound works and what soundproofing does.
In this how-to, you’ll learn how to soundproof a room. You’ll learn the fundamentals of how sound works and the four popular soundproofing methods professional studios use to create the best environment for music-making and music production.
You’ll be able to apply your newly acquired knowledge to your own home studio or practice room and anywhere else you choose.
But first…
Are you releasing new music?
Book a meeting with a Music Gateway A&R today.
Discuss release strategies, distribution, growing your fanbase, organic playlisting, press, radio and more.
What is soundproofing?
Soundproofing is about reducing and hopefully eliminating unwanted sound coming in and out of your music-making environment.
You want to reduce or eliminate the amount of sound and noise coming from the room you’re creating music in and vice versa – keeping outside noise from getting into your room.

When you’ve got a sensitive microphone like a large diaphragm condenser set up to record a guitar or vocals, the last thing you want is the sound of traffic or dogs barking all over your recording.
Similarly, the opposite is true. Your housemates don’t want to hear you compressing the same 808 Kick for 30 minutes.
Soundproofing will help you manage these issues. You’ll keep inside noises in and outside noises out.
Before you begin looking at how to soundproof your room, it’s important to understand how sound works.
Soundproof Insulation
Soundproof insulation is a type of insulation material designed to reduce the transmission of sound from one area to another. It is typically made from materials such as fiberglass, foam, or other sound-absorbing materials. It is usually installed in walls, ceilings, and floors to reduce sound transmission and improve acoustic comfort.
Soundproof Panels
Soundproof panels are used to reduce the transmission of sound from one area to another. They are designed to absorb and/or block sound waves and are made of materials such as acoustic foam, vinyl, and other materials that are designed to absorb sound. They can be used in a variety of applications, such as recording studios, home theaters, and even in the home to reduce noise from outside sources.
The Basics of Sound: Soundwave, Frequency & Wavelength
(Note if you’ve got a grasp of this topic feel free to jump ahead!)
If you understand the properties of sound, you’ll be able to soundproof any room you like (to an extent) and this knowledge will be with you for your entire musical career.
Sound is a physical phenomenon. It’s energy in the air. When that energy reaches our ears, we hear it as sound.
If you hit a snare drum, the drum vibrates, and that vibration disturbs particles in the air. The same goes for any instrument. Pluck a guitar string, for example, the string will vibrate and cause air particles to sway.
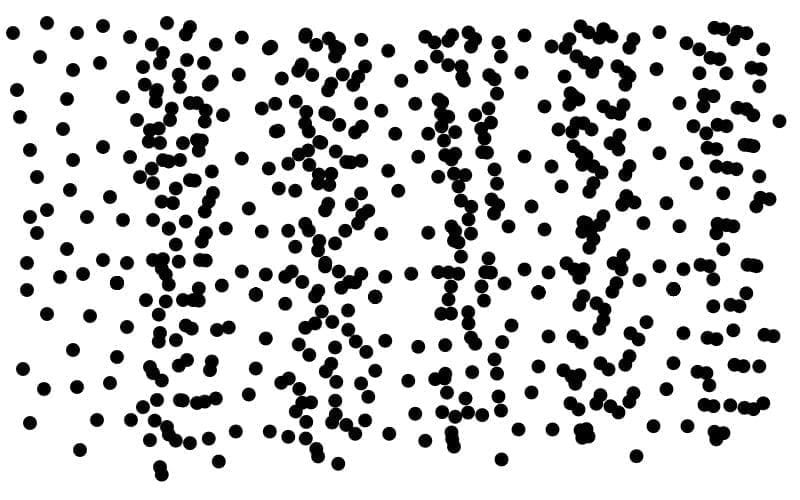
To be more exact, the particles in the air sway back and forth. They come together and separate, come together and separate and so on.
Have a look at the picture below to get a better idea of how air particles sway.
Soundwaves
The swaying particles create a ripple effect in the air which we refer to as a soundwave.
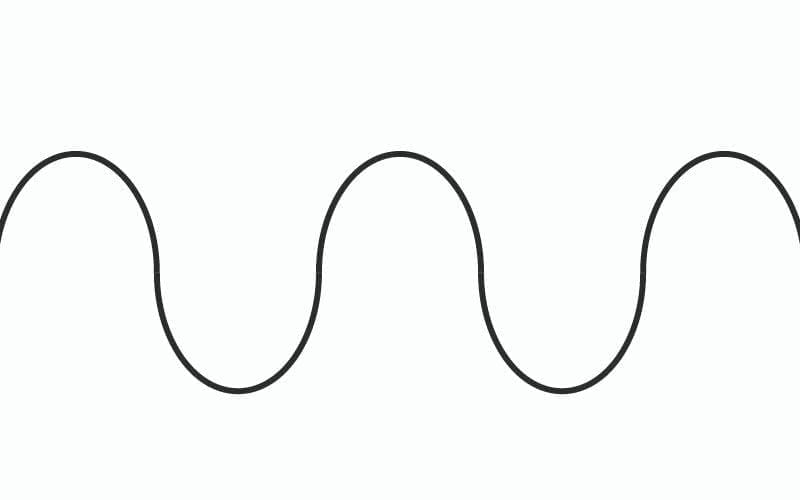
We represent soundwaves like this!
Wavelength
The top of the wave (the peak) represents the air particles coming together and the low point of the wave (the trough) represents the particles separating.
The distance between the tops of the soundwave is called the wavelength.
Frequency
All objects produce vibrations at different speeds and so it stands to reason that the air particles create soundwaves that vibrate at different speeds. The speed of vibrations in a soundwave is called a frequency – the frequency of vibrations.
A high-frequency soundwave looks like this.
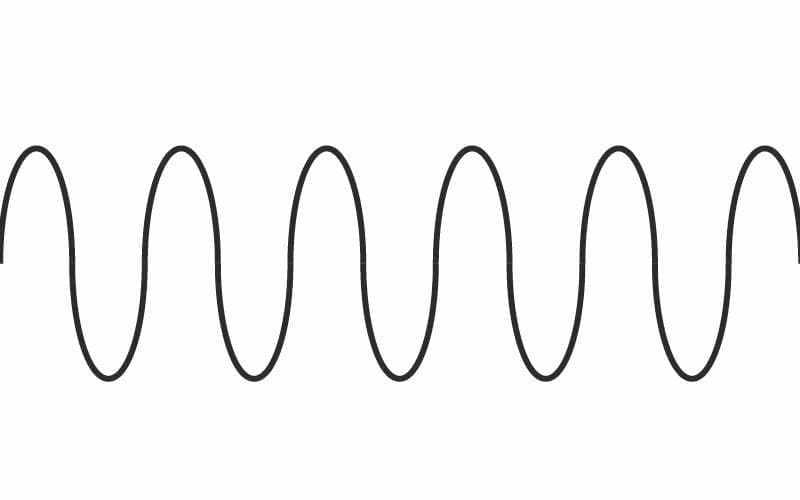
High-frequency soundwaves have smaller wavelengths.
Low-frequency soundwaves have long wavelengths. Like this.

Soundwaves can travel through any material; gas, liquid or solid. That’s why we can hear sound underwater and through buildings.
That’s it. Now you know.
That’s all you need to know about how sound works. Now you’ll understand why and how these four soundproofing techniques work.
Absorption & Absorbers
One of the easiest ways to begin soundproofing your studio is to mount absorbers onto your walls.
That soundproof foam that you’ve seen on studio walls? – yes those are absorbers.

Absorbers pretty much do what you might think. They absorb sound.
There are three types of absorbers:
- Porous absorbers
- Resonant absorbers
- Panel Absorbers
Each type of absorber functions in a slightly different way and each absorbs a certain range of frequencies.
Porous absorbers are the most common type you’ll come across; they are used to absorb high frequencies. The panel and resonant absorbers are great for absorbing middle and low frequencies.
When soundwaves hit an absorber, they go through a complicated process of energy loss (sound is energy, remember) and a lot of it is turned into heat energy by the mechanics and material of the absorber. What you get is a reduction in sound, or in other words, sound absorption.
Basically, absorbers turn sound energy into heat energy; giving the impression that sound has been absorbed.

Soundproofing Through Mass
Remember how soundwaves can travel through solids?
Well, this is why you can hear sound through walls. Sound waves hit a wall on one side making it vibrate, disturbing particles in the wall itself and the air particles on the other side. We then hear this as sound.
Adding mass to a surface like a wall or door is another way you can soundproof your room. The heavier and denser a surface is, the harder it is for soundwaves to make it vibrate.
Soundproofing Through Damping
Damping is all about reducing vibrations in your room. That means reducing vibrations in your walls, doors, floor, and any lightweight structures in the room like paintings windowpanes, mic stands, etc. Vibrations add to the overall noise/sound level in a room – loudness. If you can reduce vibrations, you reduce loudness.
Damping is like the mass method except the mass method blocks outside sounds from creating vibrations in walls, whereas damping is about dampening surfaces so they don’t vibrate and amplify existing noise.
Soundproofing Through Decoupling
The fourth soundproofing method is decoupling. You’re disturbing the conduction of soundwaves by separating the materials they pass through. Decoupling is usually done to all walls.

Instead of having one wall which sound passes through, you have two, separated by a few inches – about the width of a tennis ball, for example. You do the same to the floor and ceiling.
Decoupling works because it creates a conduction problem for soundwaves. They have to travel through one structure (the first wall), then another (the air), and by the time it reaches the third structure (the second wall), the soundwave has lost a lot of its energy. In short, decoupling a wall makes it harder for sound to pass through it.
All professional studios will have decoupled walls. In fact, they’ll have decoupled ceilings and floors.
They’re referred to as floating rooms or a room within a room.
Obviously, you can’t knock down your room or studio and rebuild it but there are accessible methods of decoupling your existing room.
Teamwork

Combining these soundproofing methods will get you the best results. Every time.
Only using one of these methods will do something to the sounds coming in and out of your room, but it won’t be the most effective. The trick is to use a combination of all four.
If you can’t use all four methods, that’s ok. Use three or even two. Just don’t be lazy.
Think of it as teamwork. In a team, everyone cooperates, collaborates and works to together to reach a desired outcome. If members of your team don’t show up, you’ll end up doing a poor job and won’t even get close to that outcome. You need all members to work together.
Start soundproofing. It’s easy.
Fortunately, soundproofing a room doesn’t have to be an expensive project.
To begin with, you could invest in some porous, panelled, and resonating absorbers. Gearformusic.com and thomann.de are great places to find affordable absorbers. All you need do is mount them strategically on your walls.
Tips & Tricks

For the floor, get a second-hand carpet/rug or even two, and use them as absorbers. In fact, with a carpet, you’re not only using the sound absorption method, you’re also using the mass method. The carpets will absorb high frequencies and make your floor denser, which minimises the conduction of soundwaves passing through the floor.
Bookcases! They’re great for adding mass. If you have a bookcase, use it to add mass and make the walls of your environment thicker and denser. It’ll be harder for sound to pass through.
Another quick and easy trick is to mount your studio monitors onto stands – here you’re using the decoupling method. If you were to leave your studio monitors on your desk, the sound would not only come through the speakers but travel through the desk and into the floor and walls.
Decoupling?
If you’re ambitious enough to decouple your existing walls, all you need do is build a frame the size of the walls you want to decouple. The frame will create a big air cavity against the existing wall. Next, lay over drywall or plywood to create the second wall – make sure the material you use is heavy and dense for the best results. Add some absorbers or a thick blanket (porous material) to the new wall to finish it off.
Don’t forget about teamwork.
Now you know how to make a soundproof room, you can effectively make any room soundproof. Use materials and build structures, however, you like to get the results you want.
Just don’t forget about “teamwork”. If you use the four soundproofing methods; absorption, mass, damping, and decoupling, in combination with each other, you’ll get some very satisfying results.


